Windows 10 first steps, post install
Core isolation; a security recommendation
Do as soon as possible
The author recommends you go to
Settings|Updates & Security|Windows Security|Device Security|Core Isolation Details
and enable Memory Integrity
(this is only possible if your CPU and BIOS support ‘Second Level Address
Translation’ (SLAT) aka Intel Extended Pages); the longer you wait, the greater
the chance that Windows will install incompatible drivers before you enable the
isolation (on older hardware that is).
Windows Security|Device Security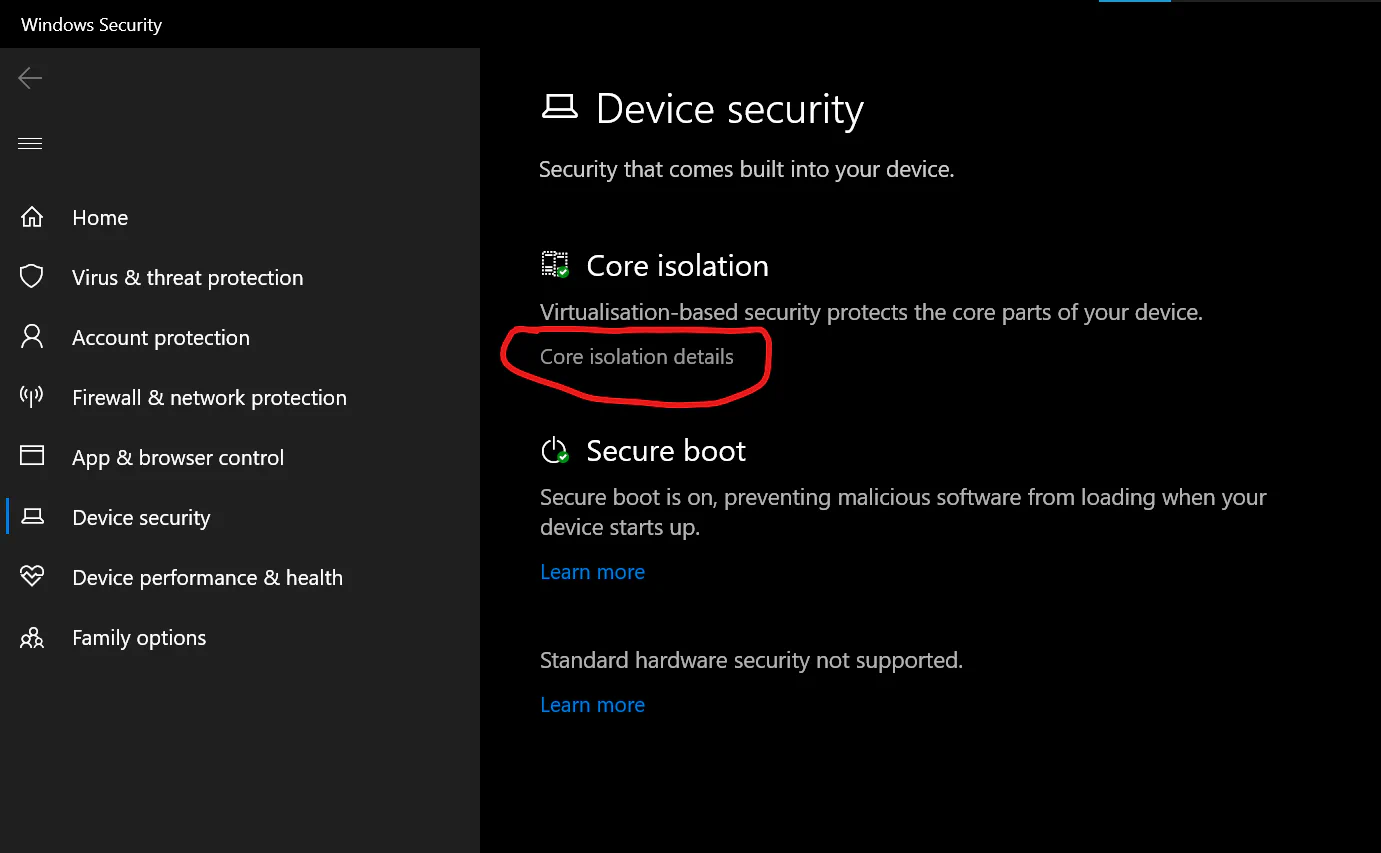
Windows Security|Device Security|Core Isolation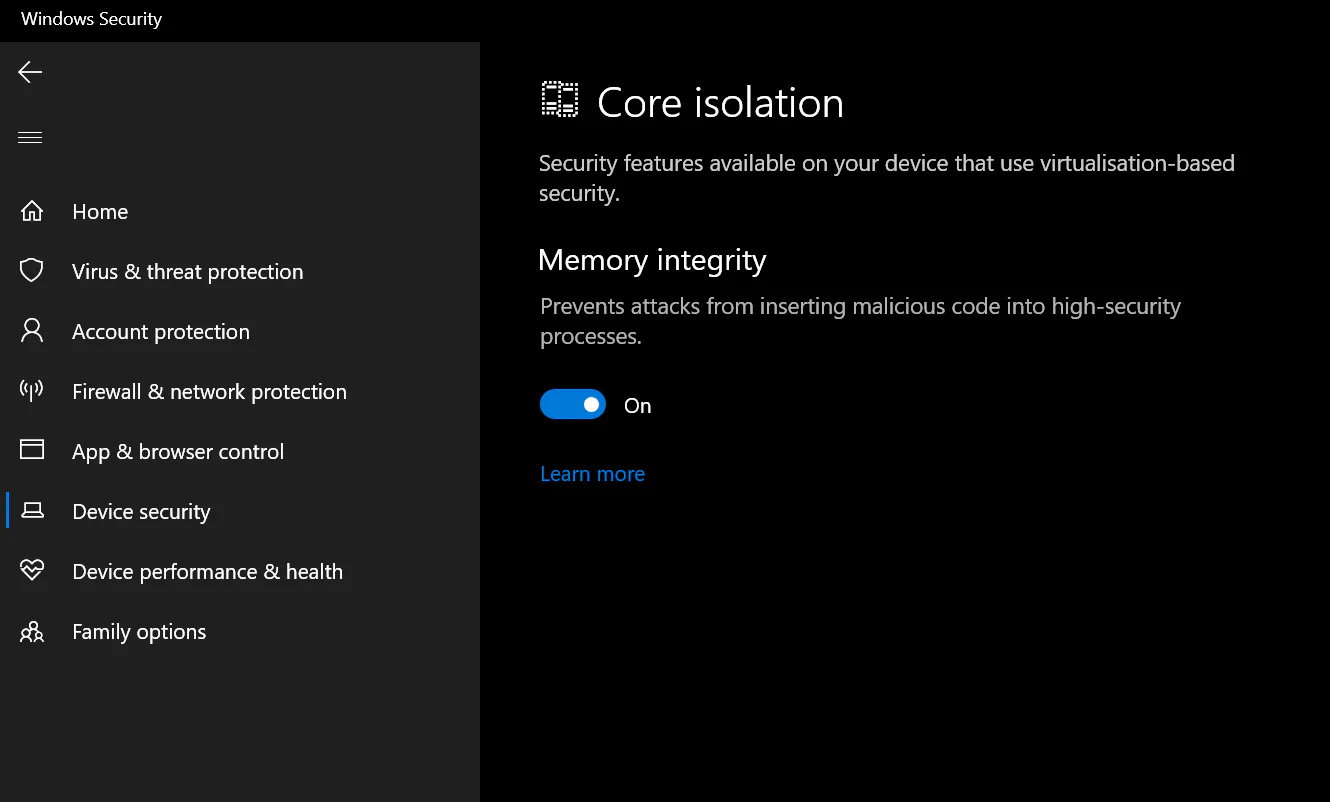
Avoiding drivers and software incompatible with ‘Core Isolation’
- Note also that you should minimize the number of drivers, especially older
ones you install.
- Don’t install drivers from
Settings|Updates & Security|Windows Update|View Optional Updates|Driver updatesunless you absolutely need to do so, as the older drivers can conflict with or prevent the use of ‘Core Isolation’ and other Windows components. - Also avoid installing third party drivers (if you need any) until after you have enabled ‘Core Isolation’
- Don’t install drivers from
- For the same reason avoid IBM Trusteer Rapport (it does exactly what ‘Core Isolation’ prevents, which is inserting itself into other processes).
- NB In some cases you may have to make a choice between enabling ‘Core
Isolation’ and full use of your hardware.
- For instance, the author has a 15-20 year old motherboard that has onboard video. The only available drivers (very old Radeon) conflict with ‘core isolation’. He had a spare add-on video card, so he installed it and disabled the onboard video in the BIOS. This allowed him to use ‘core isolation’.
- If it was like the situation with an ECS Liva X, he would have had to choose between the video drivers (in this case of the Liva X, Intel) to get full graphics capability, or using the ‘Microsoft Basic Display Adapter’ and having limited resolutions available (this depends on your monitor(s) as well). For the Liva X, he chose to use the not so great resolution because he rarely logs in to it—it’s used for storing backups from other systems and has little need of console activity.
Why one would want ‘Core Isolation’
- This is a new(ish?) security feature of Windows 10 (Pro?) that makes use of virtualisation capabilities in the hardware and OS (Windows) to isolate high-security processes to that other processes cannot insert themselves into the high-security processes.
- This reduces the risk that malware can hijack a running ‘high-security’ processes.
- It also reduces the risk that badly behaving drivers can hard crash (the infamous BSOD—Blue Screen of Death) Windows.
Respond to a first sign-on prompt
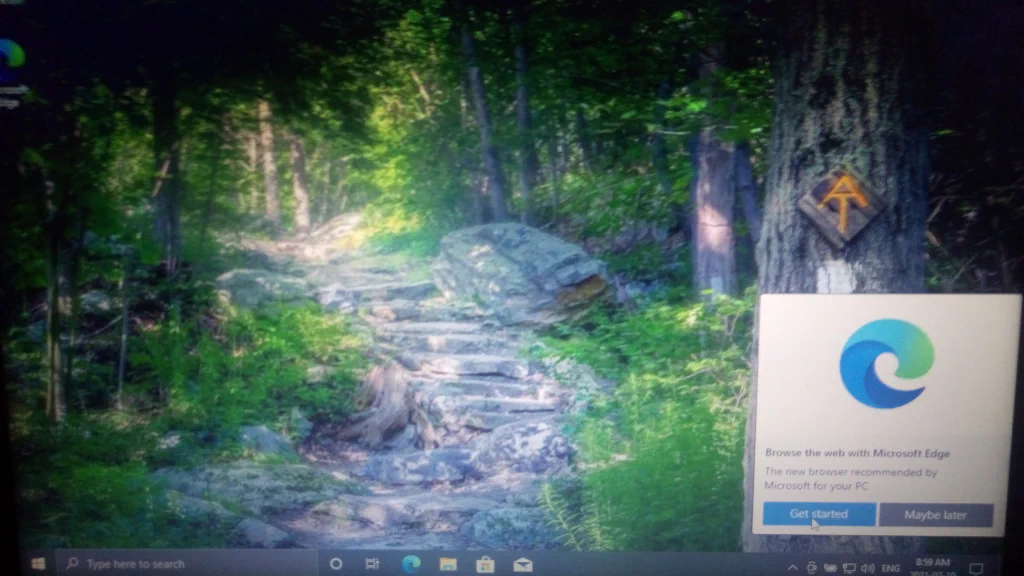
Once the Windows install process is complete and you are signed in for the first time, you will be prompted to complete Microsoft Edge setup. If you want to use Edge, you should do this (or at least make sure Sync is happening if you have already gone through this process, and enabled Sync for Edge).
Optional: rename your PC
- You may want to rename your PC to make it easier to find from other PCs on your network (although it also makes the PC easier to identify when on other networks as well).
- If you wish to do this go to
Settings|System|Aboutand selectRename PCbut do no need to reboot quite yet (assuming you are following this guide and are about to do a Windows Update).
Enable BitLocker
- Before enabling BitLocker you might want to make sure you can access your
Personal Vault, if you use that feature of OneDrive, otherwise you should make sure you have a similar feature from somewhere else available as a folder on your computer (if not the next section won’t work) - When possible, it’s a good idea to enable ‘BitLocker’ in order to encrypt the contents of your storage device.
- If you get message that you can’t enable BitLocker because you don’t have
TPM, then:
- Start an admin PowerShell
- Right-click the ‘Start Menu’ or press Windows-X
- Select ‘Windows PowerShell (Admin)’
- Execute
& gpedit.msc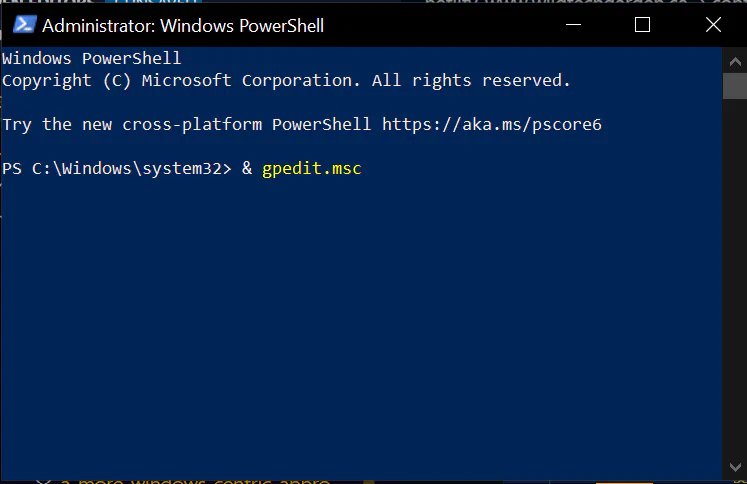
- Double-click
Administrative Templates|Windows Components|Operating System Drives|Require additional authentication at startup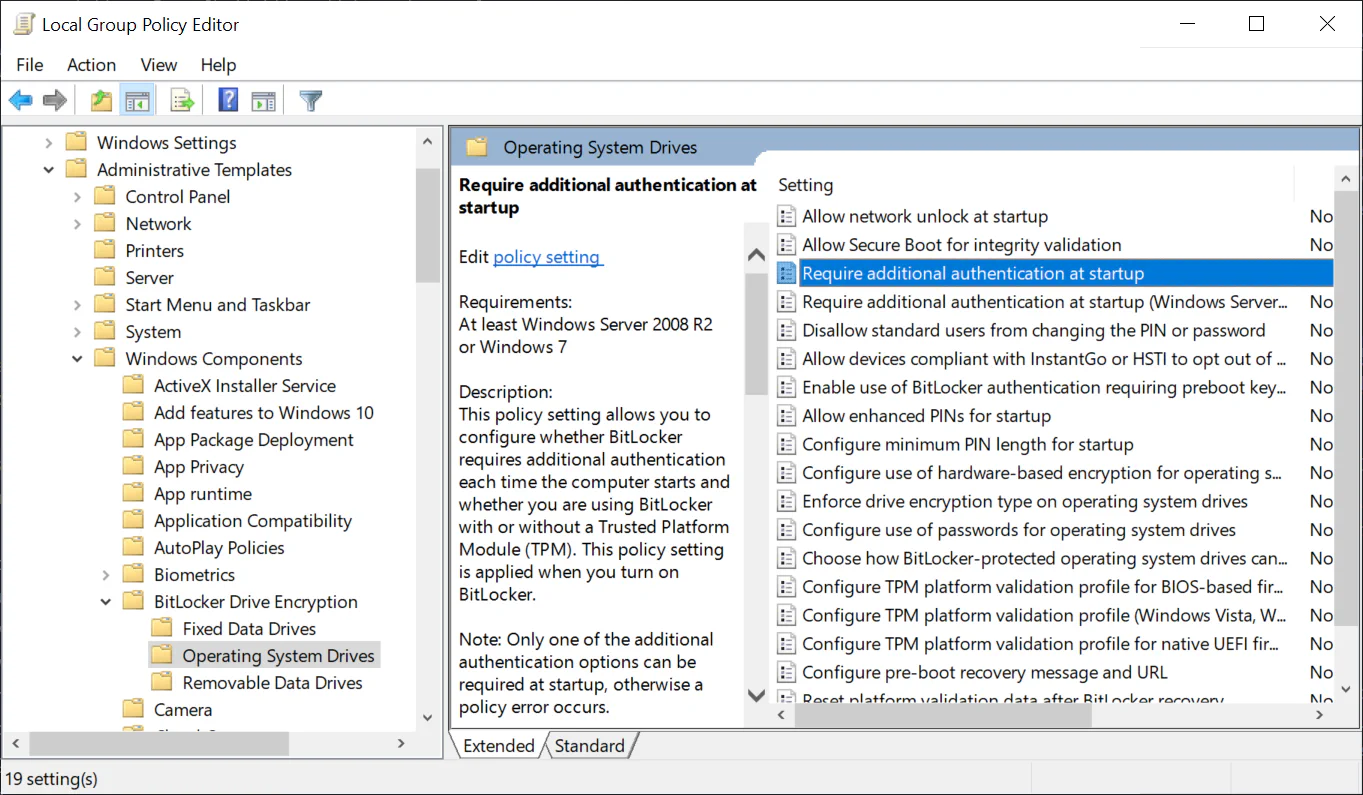
- Select
Enableand thenApply - Have an empty (but formatted) USB available; it can be quite small.
- When BitLocker setup requests a USB drive point at the drive you prepared
- Start an admin PowerShell
- Whether or not you have TPM you will need to save a backup of your BitLocker
Recover Key.
- The easy way is to save your Microsoft Account
- The author’s preferred way is to print it to PDF and save the PDF in
Personal Vaultin OneDrive (and then transfer to a Password manager program and remove the PDF, when it’s convenient).
Make sure your system has the latest updates
- It’s important to perform a ‘Windows Update’ sooner rather than later.
- The author recommends using
Advanced Optionsand selecting the setting to get updates from other MS products at the same time. - The author doesn’t like using other PCs on the Internet for updating
Windows, but it is an option available in
Delivery Optimization.- He doesn’t like it because the net result is other (strange) computers can access your computer from outside, however constrained that access is supposed to be.
- The author recommends using
- Author Preference: Set “Show a notification when your PC requires a restart to finish updating”
- Author Preference: In
Settings|Accounts|Sign-in OptionssetUse my sign-in information to automatically finish setting up my device after an update or restartto be Off. - At this point, I recommend performing a
Windows Updatebefore doing anything else. - Reboot when requested to apply Windows Updates, or after updates complete, if updates do not require rebooting (for the name change).
- After rebooting, use ‘Windows Update’ one more time, to verify that there are no updates that depended on the completely (rebooted) updates you just installed.